Wednesday, April 18, 2012

An apron and a found project

Back when I did the Spice Up The Kitchen Swap my sweet bloggy friend Susanne made my daughter an apron. She LOVES this apron and wears it every time we cook together. Lately she has hit a growth spurt and it's getting too small for her. I decided it was time to make her another one.

I found this easy tutorial on Michael Miller Fabrics and decided to pull out some of the kitchen type fabrics I have to make this. (And really, I have no idea why I have so many food fabrics!). This tutorial was easy to follow and can be modified for adult or kids aprons.


The tutorial calls for a yard of fabric for each front and back. I had that for the front, but pieced together a half yard for the back. (seriously - what was I going to do with this grocery print?)


She is thrilled with it, but of course would not model it for me. It was nice to do a fun little quickie project like this.

And while I was searching my stuff for the D-rings to make this. I came across this bin...


Yup, that is a bag pattern and all the supplies to make it. Included unopened fabric from Fat Quarter Shop. Whoops! Please tell me I'm not the only one who has totally forgotten a project! This one is back up on the top of the list.


Monday, April 16, 2012

Some clothing sewing


I bought this Amy Butler pattern a while back with the idea of making a top for me.


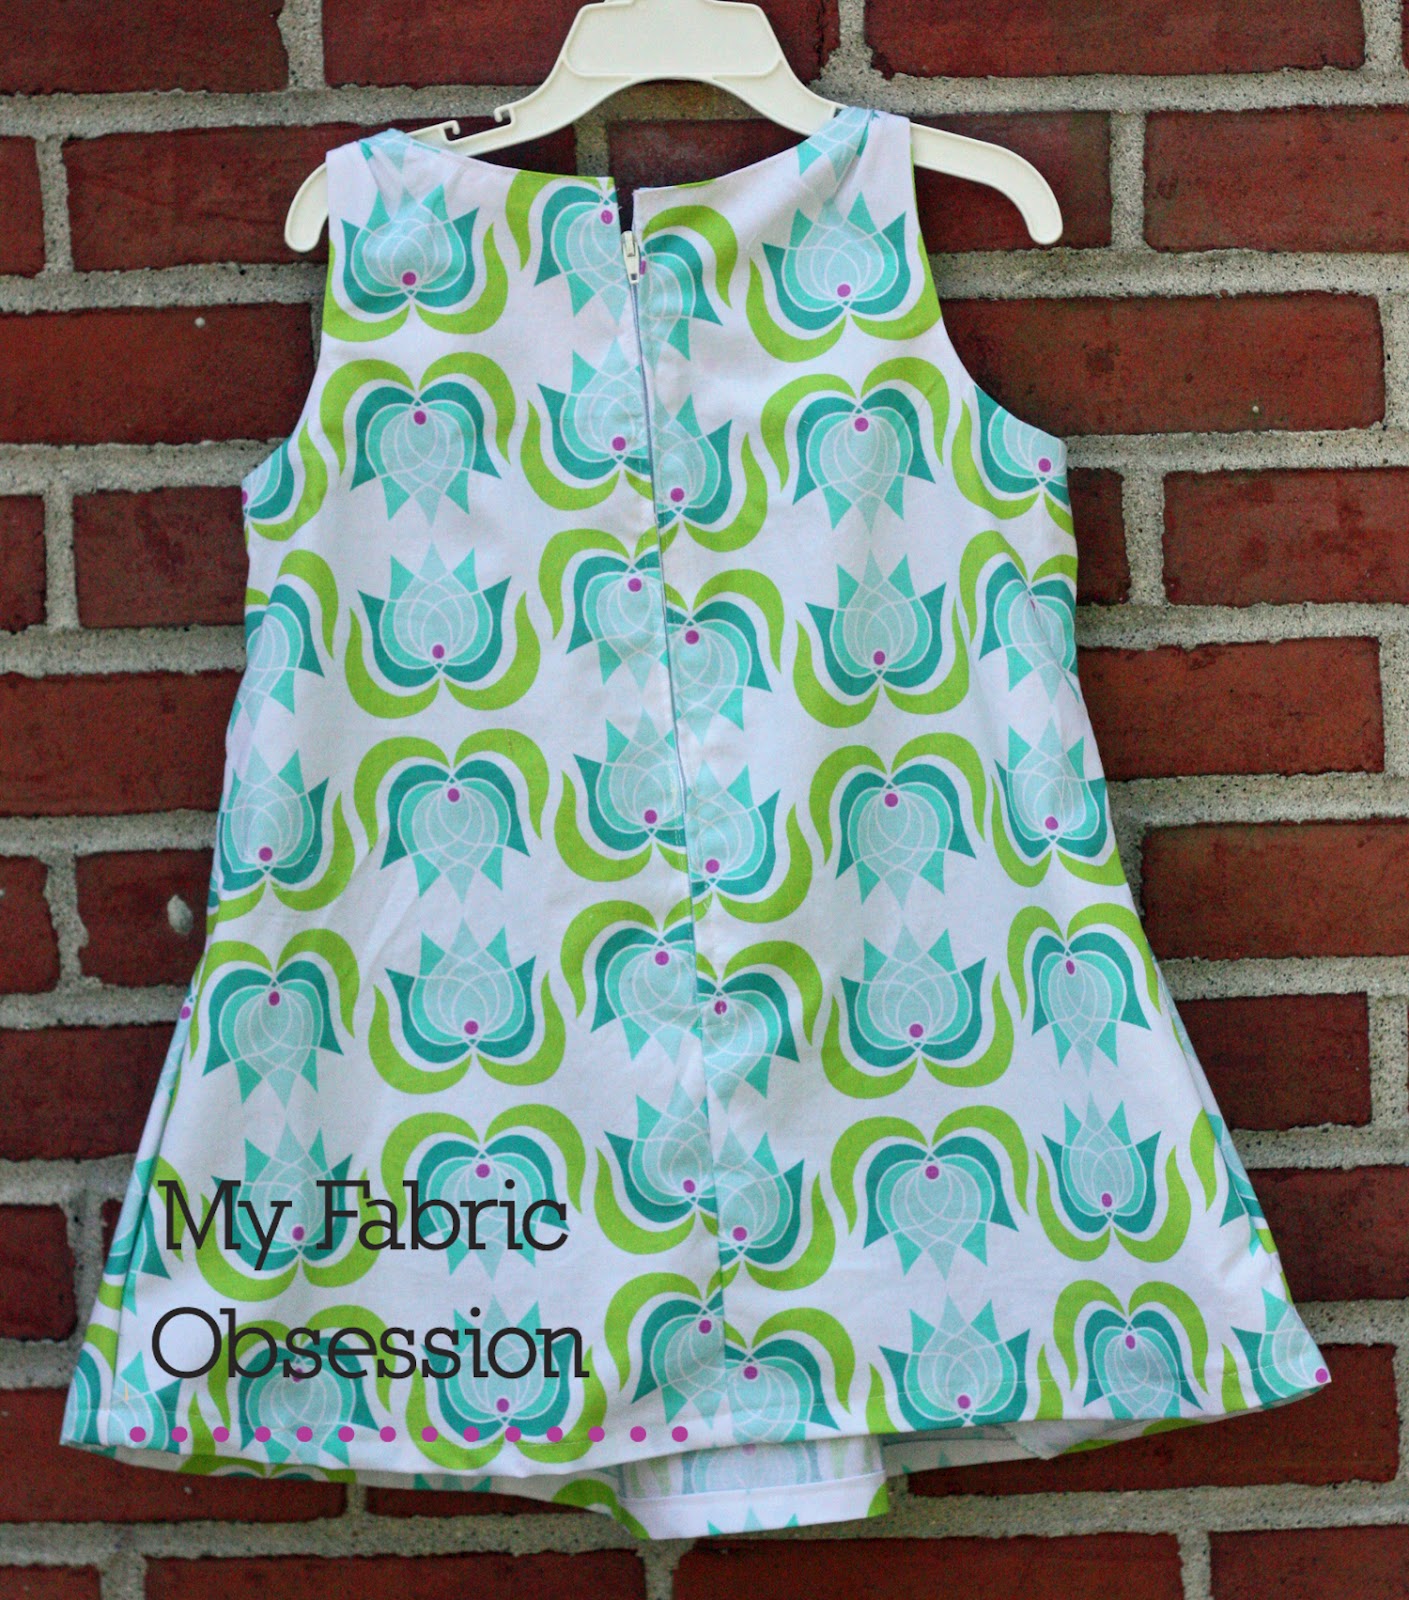
When I got it home I realized it made girls sizes too! Wohoo! So I figured before I use a lot of fabric and possibly mess it up, I will try a girls size first for my daughter and get comfortable with the pattern (knowing that her patterns are sometimes hard). I love Patty Young fabrics so I got this Modern Lotus print from her Lush line for the dress.  I think it turned out adorable.


Of course my model is reluctant to wear it right now. Her response was, "I'll wear it when I get bigger". Sigh. She will wear it when it gets warmer. As long as I don't ask her directly, she will wear whatever I put out for her.

Here's the back view of it.


My prints didn't match up 100% but I don't mind. I didn't really try to match them up.

The pattern was one of the most well-written Amy Butler patterns I've ever done. It came together very quickly. I didn't have any problem following her directions aside from one little thing.


If you look at the inside here where the zipper is. The left side is all covered and the right side has the zipper exposed right?  I struggled with the directions a bit at this point and didn't realize I was supposed to leave the flap of fabric out on both sides and I only did it on the one side. It's a nice touch and leaves the dress looking very professional. But I don't think I'm going to rip the other side to fix it. All the edges are finished there so it shouldn't unravel. And it won't be visible when she's wearing it.

Besides, I already have to fix the eye and hook so they line up -whoops!


Next up, a top for me in voile. I've never worked with voile so if you have any experience or tips, I'd love to hear them.


Tuesday, April 10, 2012

Bee blocks for April

For April Sew Modern Bee, Shanna asked for Rainbow Stars. She gave us an inspiration mosaic and said we could do what we like with the fabrics she sent us.  She had a lot of wonky on there and I don't do wonky well (at least not on purpose). So I decided to do some paper piecing.


The first was this Rainbow Star Block. The pattern is found here.


And this one is my favorite. It's also found here and is called the Birthday Star block. The visual illusion on this one is fun. If you look at the original block, it's actually made for 2 solid colors and there is an interlocking square in the star.  When I started this, I tried to do a cool square and a warm star. You can see it if you are looking for it. But in my opinion, when you look at the block, it kind of just looks like a swirling star. And I probably would have arranged the colors differently if I did it again. Either way, I love it and I hope Shanna does too!


For do.Good Stitches, Marian asked us for house blocks using this Olive and Ollie Tutorial. It's a great tutorial and easy to follow. Here are my two blocks. First, what I've been calling my hippie house...

And my purple house.


Hope you like them Marian! This is going to be a fun quilt when put together.


Monday, April 9, 2012

Double Wedding Ring Finished


It's finally finished and photographed! Those of you who have been following me for a while got to see quite a few work in progress photos of this quilt.  (I let hubby take the photos and he didn't warn me there was a big shade stripe!).


I followed The Plaid Scottie's Double Wedding Ring QAL for this quilt. Some things I learned:  curves aren't that hard!  As I mentioned during the process, one place I deviated from her directions was once I sewed all the arcs on the paper templates, I found it easier to sew everything together with the paper removed. It was nice to have the fabric give a little for the curves. I just pinned the center and ends together.

Also - it feels really good to cut into the stash you've been hoarding! I used my Neptune (and Prince Charming) for this and it was nice to get to sew with it. If you've been saving something, use some of it!


Finally, when I did my binding, I didn't miter the curves. I just sewed to the center of the curve, stopped needle down, shifted the fabric and pivoted the quilt.


When I was done the quilt top I knew I couldn't quilt this one myself. So I sent it to my amazing quilter Margaret. She always does a fantastic job. What do you think??


I had no idea what I wanted, I just knew I didn't want traditional feathering. She sketched and quilted these amazing flowers for me when I suggested floral. I love them!


And the swirls!!And don't forget she quilted on every patch in the arcs. I know this quilt will last because of it, thank you Margaret!!


I had to include a close up of my intersections because I'm so proud of them.


 Here's another shot we took in the shade and I attempted to brighten up.


I don't know where this quilt is going to live yet, but it's definitely mine all mine!


Quilt stats:
Size: 55"x 55"
Fabrics: Tula Pink's Neptune and Prince Charming, Kona Charcoal
Finished: 3/28/2012


Tuesday, March 27, 2012

A Retro Flowers Wallhanging


Yesterday I finished this wall hanging for my daughters room. I used the Retro Flowers pattern from The Sometimes Crafter. I love this pattern and was waiting for the perfect use for it. Then we got my daughter her big-girl furniture and there was a whole bare wall just waiting for something to go on it.


I had lots of scraps left from this quilt which is now on her bed.

 You can see more of it here. So I decided this was the perfect use of this pattern and I'm so happy with how it turned out.


Thank you to all of you who gave me input on the quilting of this. Ultimately, the vote was split almost 50/50. But because of all of your comments, I decided I was too worried about the quilting taking over on this. So I did quilting that mimicked the design.


I think I made the right decision with that too.


The backing is a scrap from my first quilt.


And the binding is some leftover Parisville.


Since I used up so many scraps, I'm linking up to Stitched in Colors Scrap Attack. When you have time, go check it out, there are a ton of great quilts being featured. It's good inspiration for using up your scraps!
Scrap Attack Quilt-Along
 
 
Quilt stats:
Size: 40.5"x40.5"
Pattern: Retro Flowers
Fabrics: A mixture but mostly Robert Kaufman Vive La France and Moda's Lily and Will
Quilted by: me
Finished: 3/26/2012


Tuesday, March 20, 2012

Soliciting opinions again...

I've been sitting on this project for a few days trying to decide what to do with it so let me see what you think.


I finished a wall hanging of Retro Flowers. It's 9 of the above blocks. I don't have a picture of the whole thing, but you get the idea. It's all basted and ready to be quilted. I have been toying with the idea of doing baptist fans per Don't Call Me Betsy's tutorial. For those of you unfamiliar with this type of quilting, here's an idea of what it looks like.


I'm afraid it may overwhelm the quilt though. I've done some practicing and I can do this quilting so I'm not worried about that. But, as a straight line quilter, I'm afraid to step out of my box.  Especially since these blocks were a little time consuming and the fabrics I used are now gone. Part of me wants to stick with what I know and straight line this.


What do you think? Thanks for helping me out!


Saturday, March 17, 2012

Some Happy Mail!


Yesterday was one of the most stressful days of my life. I won't bore you with all the details. Will just say a routine doctor visit for the baby wound up being hours at a specialist. He is fine, it was a false alarm. But I'll tell you what, don't be scaring a sleep deprived mama like that!!


Anyway, when I got home, I got some happy mail and it totally made my day. I had won a giveaway from The Intrepid Thread hosted by Melissa at Happy Quilting. They shipped it and got it to me super fast. Here's my beautiful fat quarter set of Poetica by Pat Bravo.


Big huge thanks to Julie and Melissa for the giveaway. You guys rock and really cheered me up.


I've still been sewing a bit around here. I hope to have some finishes to share soon!


LinkWithin

Related Posts Plugin for WordPress, Blogger...