Friday, December 9, 2011

Tote bags - batch 2!

The second batch of teacher totes have been finished for a while. I just had to wait a few days for some actual sunlight so I could take photos. We've been getting a lot of rain around here, it was getting depressing.

This is my favorite I think, despite the mistakes. The top print I cut in the wrong direction! I din't have enough to cut it again so I left it.


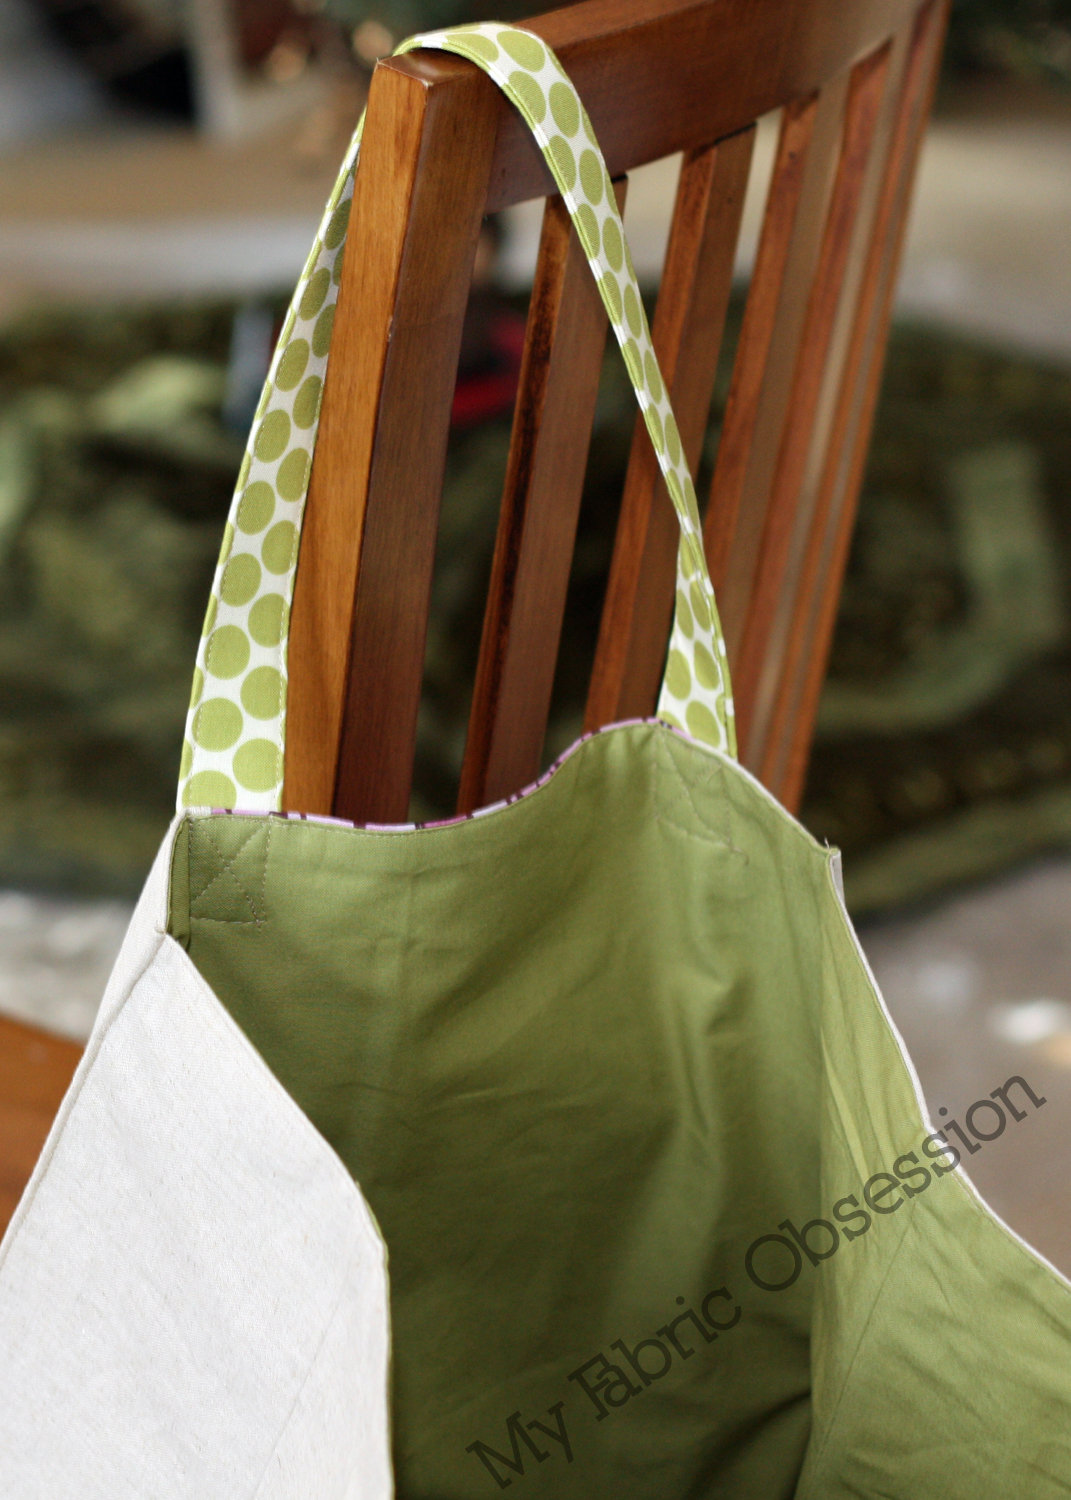
And the lining fabric I was about 2 inches short so I pieced in a strip from one of the other bags fabrics that went with it. I had a serious brain fart when I took this photo. I didn't even realize the strap was covering the strip, sorry.

Here's the other bag in the purple fabric.

The lining is a simple green.


And the final bag uses Aviary2 again.

I didn't photograph the lining because it's just a solid yellow.


Now I have to decide who gets which bag!  How is your holiday sewing going?

eta: These bags were made with the Jane Market Bag pattern. As I mentioned in this post, I definitely recommend this pattern!


Monday, December 5, 2011

Aviary Birdbath Finish

The alternate title for this post is Things We Would Only Do For Our Mothers.

I finally got the Aviary Birdbath Quilt finished and I'm so happy with how it turned out. This is one mammoth quilt!

Back in February my mother asked me to make her a King size quilt.  She selected the Birdbath pattern from The Practical Guide to Patchwork by Elizabeth Hartman. And we both love Aviary 2 from Joel Dewberry.  Her other request - "as much white as possible". She's a Floridian now. 


So since the Birdbath pattern was really for a lap quilt, I decided to expand it to cover the top of the bed and then the draping on the sides is white.  I managed to get a quick photo on my bed to show how it lays. This was fast and sloppy as a 3 yr old was circling me yelling that she didn't want pictures.


The final dimensions are 92" x 105".  Now let me first say, I really like Elizabeth Hartman's book. Her directions are great and well photographed. But this pattern should definitely be lap sized! Each block is very time consuming because each step requires that the block be squared off. Otherwise you get some lopsided blocks. In the end I made 72 of those blocks. I also had a spreadsheet going so I could keep track of which fabric combinations I used.


There was no way I was going to be able to quilt this bad boy myself so I sent it to my wonderful quilter Margaret and challenged her with those giant borders! We wound up deciding on an overall pantograph for the center and Margaret designed a really cool custom design for the border.


Since King size isn't square the borders on 2 sides are even wider.


I love it, I think it's very Florida.  Reminds me of water and palm leaves.


Above is the quilting on the back so you can see the overall design that's on the back. And let me just tell you, I really had to mess with this photo to get this to show up so nicely! The quilt is really white with white thread, it's just my photo editing that makes it look all gray.


I had some extra blocks so I pieced those on the back with my label.


I just need to write my final info on the label and wash it! To be honest, I'm terrified to wash this one. I may throw an entire box of Color Catchers in there. There is so much contrast I'm afraid it will come out gray.


Quilt stats:
Size: 92" x 105"
Pattern: Birdbath - Elizabeth Hartman
Fabrics: Aviary 2 by Joel Dewberry and KonaWhite
Quilted: by Mainely Quilts of Love
Finished: 11/27/11


Wednesday, November 30, 2011

Jane Market Tote - 1st batch

I didn't do a WIP Wednesday post today because other than the binding on the Aviary Birdbath quilt I've only been working on one thing around here.

I had been tossing around the idea of making handmade gifts for my daughters teachers. When I saw Lindsay's post with her Jane Market Tote I knew I wanted to make these. I love the linen she used so I ordered some Essex Linen in Natural and the rest of the bags are being made with stash.

My first Jane Market Tote was actually made as a thank you gift for Lee. She loves Neptune so I broke into the stash and made this one. I went with the 808 Peltex Lindsay recommended.


The 808 was a little stiffer than I wanted for the teacher gifts so I switched to a regular fusible web (maybe heavyweight?) and used 808 for the handles. The first one is for the language arts teacher.


The next two I haven't decided which teacher will receive them yet. The first is using Aviary 2 and Kona Gray.


And the this one uses a couple different fabrics with the Essex linen again.


She has 6 teachers so I still have 3 more bags to make. I'm getting to be quite the expert! After making these I would definitely recommend the pattern. It's well written and easy to follow and the resulting bag is a great size!


Sunday, November 27, 2011

Basic no-hem curtain/drape tutorial


I don't think I ever posted my first finished bedroom curtain. But I talked about it and a few people expressed an interest in a tutorial. So here it is. I am by no means an expert, this is just the way I've figured out how to make a no hem curtain. These are my finished curtains.


And closed so you can see how full they are. One panel extended all the way will cover the full window.


Supplies:
  • curtain fabric (we'll measure in step 1). You can use any weight you like, I used home dec. Just remember your curtain rod needs to be strong enough and far enough from the wall to accommodate the weight and fullness of the fabric and lining you choose.
  • lining fabric. Again, the weight is up to you. I used black out weight because this is our bedroom and I wanted dark for those rare mornings the kid actually sleeps in.
  • thread to match curtain fabric
  • walking foot (optional)
  • heavy duty needles. I used the Jeans/Denim weight needle.


  • Grommets. I used Dritz (You can get these at Joann or Amazon). I don't know if there are better ones available, this is just what I found that didn't require any tools to install them.


First step is to measure your windows. Make sure your curtain rod is already in place.


Measure from the rod (and maybe an inch above) to the length you desire (mine are only going a few inches below the windowsill because I'm adding furniture under the window). Add about 6 inches for the top hem and only about 1 inch for the bottom "hem". This measurement will be cut from your length of fabric.

For your width measure the width of the rod. The general rule for fullness is to multiply that by two for your entire set of drapes. Another way of saying that is that I'm making two panels, each is the width of the curtain rod. This way it gathers with a nice fullness.  This measurement will be made up of your width of fabric. In my case 54".

Once you have these measurements this is how we determine how much fabric to use:

In my case the length was  56"+ 7"  for hem (top and bottom). 63" total for one panel length.

My WOF is 54" and the window width is 76 inches so I know that I need 2 WOF per panel to cover the whole window.

Per panel I need: 63" (length) x 2 (wof) = 126" or 3.5 yrds

I need 4 panels (2 per window). So I need 3.5 yrds x 4 panels = 14 yards (gasp right? this is another reason I didn't make them go to the floor!)

Write down your measurements and get your fabric and liner and you are ready to go.

With those measurements you can start cutting your panels to the length you need. Don't bother to trim your selvedges.  First thing will be to sew the two widths of fabric together so you get your panel of decorative fabric. Sew selvedge to selvedge.

I didn't do an exact seam allowance, just sewed next to the selvedge so that they are hidden in my seam allowance.


Now you need to cut out your lining fabric. I laid out my decorative panel and then laid out the liner on top for cutting. Since they were so large, I didn't trust my measurements. You could measure and cut instead. I chose to crawl around the floor. (also, in this photo I had my first curtain already done and was using that to measure so the 2nd panel matched. That is why you see grommets already attached).


Sew down your lining to the right side of your decorative fabric starting with the bottom edge.  Then do the sides leaving the top open. Again, make sure you sew within your selvedges. 

This is where the optional walking foot comes into play. The lining fabric can be sticky. If you do not use a walking foot, make sure your lining fabric is on the bottom when you sew. If you have a walking foot it can be on the top or bottom. It just needs those feed dogs to help it go smoothly.


*side note - I don't know which side of the lining fabric is correct to have facing out. My research showed people who said both sides were correct. I think it's just personal preference.

Clip your corners and turn your curtain right side out. You should iron your sewn edges at this point so they will lay nice and flat. 


If you prefer, this would be the point to zig zag or serge your raw top edge to keep down any fraying. I left mine alone.

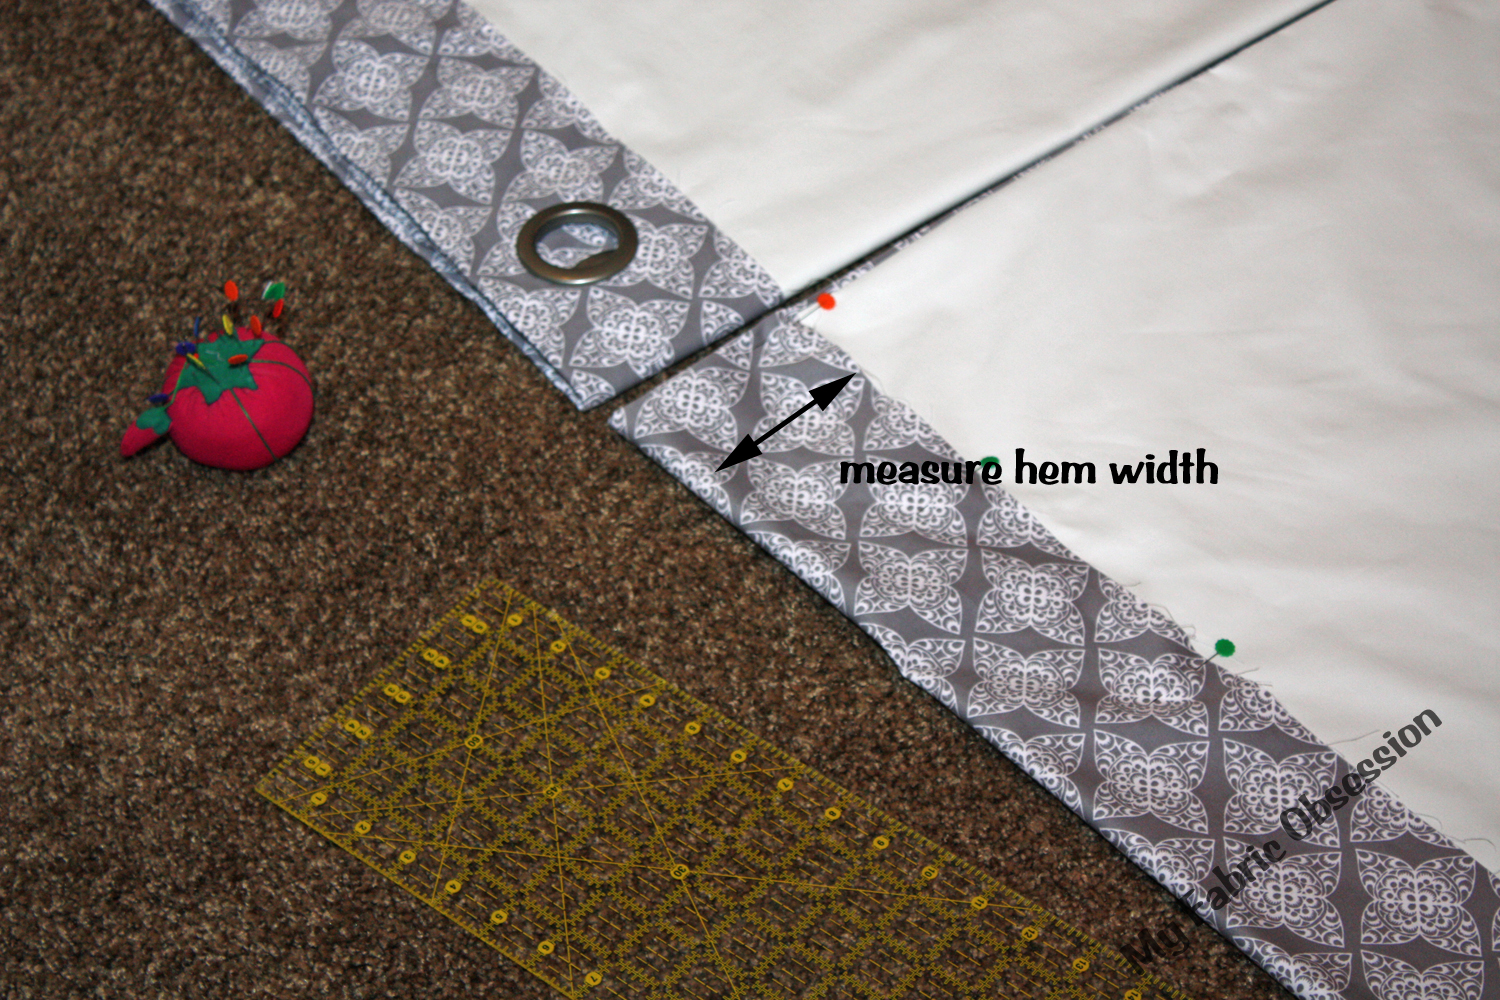
Next is the most time consuming part, the top hem. Lay out your curtain and fold over the top, measuring from top to bottom to make sure you have the length you want.

I find it easiest to then measure the top hem and use that measurement across the top to make sure everything is straight. That way you are only measuring 4/5 inches rather than the entire curtain length.

Before you pin that down, pull out one of your grommets and eyeball where you want it to go. Trim your lining fabric so it will not be under the grommets. I learned that these things do not like excess thickness. But keep your lining fabric long enough so it will be sewn under the hem.


Sew your hem down with your matching thread.

Now it's time to add the grommets.  Using the template in the package mark the circles where you want to place your grommets and cut them out. If you left your lining fabric within those circles cut it out so only the fabric will be within the grommet. They won't snap otherwise.


Snap in the grommets. You will need a hard surface underneath you to press against. These take a little bit of muscle.


Once they are in, you are ready to hang them! Voila! I hope you found this helpful. I'd love to know if you use this or if you have a different way of doing this.


Wednesday, November 23, 2011

Work In Progress Wednesday: Pre-thanksgiving edition

Ahhh, the day before Thanksgiving. This year I'm just relaxing because we are going to my in-laws. I usually prepare the meal here so I'm usually in pie-baking mode. Well, there may be pies this weekend in addition to a mini-thanksgiving meal. After all, I love leftovers and any excuse for dessert is a good one. Hope you all are getting ready to enjoy some family time.

Here's what's been going on in my sewing room.


Finished this week:
Pink Flannel Nightgown

In Progress:

The binding is going on the Aviary Birdbath quilt. This should be on my WIP list for a little while I would think.


I put together my leftover blocks from the Fast Forward Baby Quilt (which needs a new name) for the backing. Just have to finish the large fabric chunks and I can send it for quilting. I've decided to cross this off my list and send it away instead. I think it needs some more skilled quilting than I can give it.


I finally got it together and finished the sewing for all my bedroom curtains - wohoo! I am marking the grommet holes and once those are put in I can hang them. I've also taken pictures for a tutorial, so hopefully that will be up soon. Just waiting on hubby to hang them so I can get that "finished" photo.


I've started a scraps hourglass quilt. I've been using this as a leader and ender to my sewing and amazingly the blocks are getting put together quickly this way. This will definitely be on the wip list for a long time. These blocks are pretty small!


The gifts have finally made it on my WIP list. These will have to remain somewhat secret until they've been given. This one is obviously a christmas themed present!


And this one? Well, it's some Neptune. ;)


And you may have already seen this photo of the progress I made on my double wedding ring arcs at our PMQG sewing night.  I haven't done anymore since then though.

Stalled this week:
X-quilt - need to make a few more blocks
do. Good October quilt - still waiting on  a few blocks
Teacher gifts for my daughter
apron
baby scrapbook album
nursery decorations

Total WIP this week:  lucky 13


As usual, I'm linking up to WIP Wednesday at Freshly Pieced. Stop over and link up your own!
WIP Wednesday at Freshly Pieced


Monday, November 21, 2011

The pink nightgown

I had this idea a few years ago to dress my daughter up like a certain Christmas character for our cards. It didn't work then because she was too young to cooperate. But I'm thinking of attempting it again this year. It requires a pink nightgown which around her they really don't make. Everything is footie pajamas. I found a Simplicity pattern and some pink flannel and here's what I've got...

When I started the pattern I realized it was actually a robe or housecoat which is fine. I don't know that she'll ever wear it again anyway. My husband calls it the 18th century nighty!

So who is she going to be? I'll give you a clue. She will also be holding this giant ornament and I'll be putting antennae in her hair.

Any ideas?  Am I a mean mother for dressing my kid up for christmas cards? If she won't cooperate (which is likely) I'll be doing the old standby. Putting her in front of the tree and taking her picture.


LinkWithin

Related Posts Plugin for WordPress, Blogger...